
How to start: blog family history
This post is based on a presentation I did at the Australian History & Genealogy Expo 2016 that was put together by the great team at Unlock The Past and Gould Genealogy. This blog post is the supporting notes.
The talk focused on how to blog your family history right now. A DIY for beginners with minimum tech talk. In the notes you may find some technical words that you are not sure about. I will create a glossary for this talk and the online interest group at the Caloundra Family History Research Inc, that I coordinate. This should be available soon and I will then link it to this blog post.
Why should you blog your family history?
- Would you like to share your family history research with family members?
- Looking to make contact with lost cousins?
- Like writing or want to improve your writing but with no pressure to publish a book?
- Has someone out there got the answer to your brick wall nightmare?
- Have you considered writing a blog?
Today I am talking about the easy way to successfully build your first family history blog.
What is a Blog?
The word Blog comes from Weblog. Think of a diary or a way to share ideas.
They have not always been called Blogs. First people referred to “personal homepages”. This happened in about 1994.¹ But lets not waste time on the history and jump to today and how you can create a blog very quickly and at no great cost.
How to start blogging your family history
There is a bit of thinking to do before you start.
First your need understand, identify or clarify your reasons for creating a blog. Some examples:
- You want to keep a diary to share with your family and friends.
- Share your research.
- Run a family reunion.
- Find lost cousins.
- Write down my ancestors’ family history in a story style.
- Or your own history to create family history for future generations.
- Break down brick walls.
- Create a web presence for a group or society
- Some or all, Etc
Knowing your reason for creating a blog will help with content. Without a reason for needing a blog you should not go ahead as it will making blogging a chore. Lets be clear here, with no reason or reasons to blog, do not go ahead.
What type of blogger do you want to be?
Second thought to consider is what type of blogger to you wish to be? How much time, effort and money you wish to spend on your blog?
On one side: Are you saying to yourself I am a beginner? Blogging will not take over my life. I plan to write when convenient, when I have something I want to share with family and friends. It might be infrequent. I’m not sure if I can do this. Who will want to read my blog? Or if you are a toe in the water type of person.
Are you a beginner with other interests?
On the other side, are you are thinking “I want to become a well-known genealogy blogger, make money from my blog and travel the world.” Then this recommendation on how to blog is not for you.
Next Select a Platform
There are 3 main platforms to select from:
- Blogger – Google product – free
- WordPress.com – hosted on WordPress Servers – basically free.
- WordPress.org – Self-hosted blog – requires some investment. (This is the platform my travelgenee.com blog is hosted on.)
I am going to recommend for very beginners, or even societies that want to start a small webpage at no cost, to go with Blogger – the Google product.
Blogger is suitable for absolute beginners because of zero cost and ease of use. It is ideal for hobby and personal blogs.
There are other platforms however we will leave any technical and strategic pros and cons related to blogging, technology definitions and things like platform choice to the end, if we get time and you are interested.
The idea behind leaving the technology and strategic parts till later is that sticking to starting with the basics rather than get caught up in technical worries, you will not limit your chances starting successfully and straight away.
The steps to create a blog
The main tasks starting a blog using the Blogger platform blog are:
- Pick a name.
- Write a post.
- Publish your blog.
OK it might take you over half an hour to pick your name. Selecting a name, like selecting a platform is one of those things long time bloggers get serious over. You can pick a name that will make it more difficult later but again I defer this discussion later in the talk or another blog post.
Lets get on with creating the blog
First go to Blogger.com – see the next image. The image does vary. Click Create Your Blog.
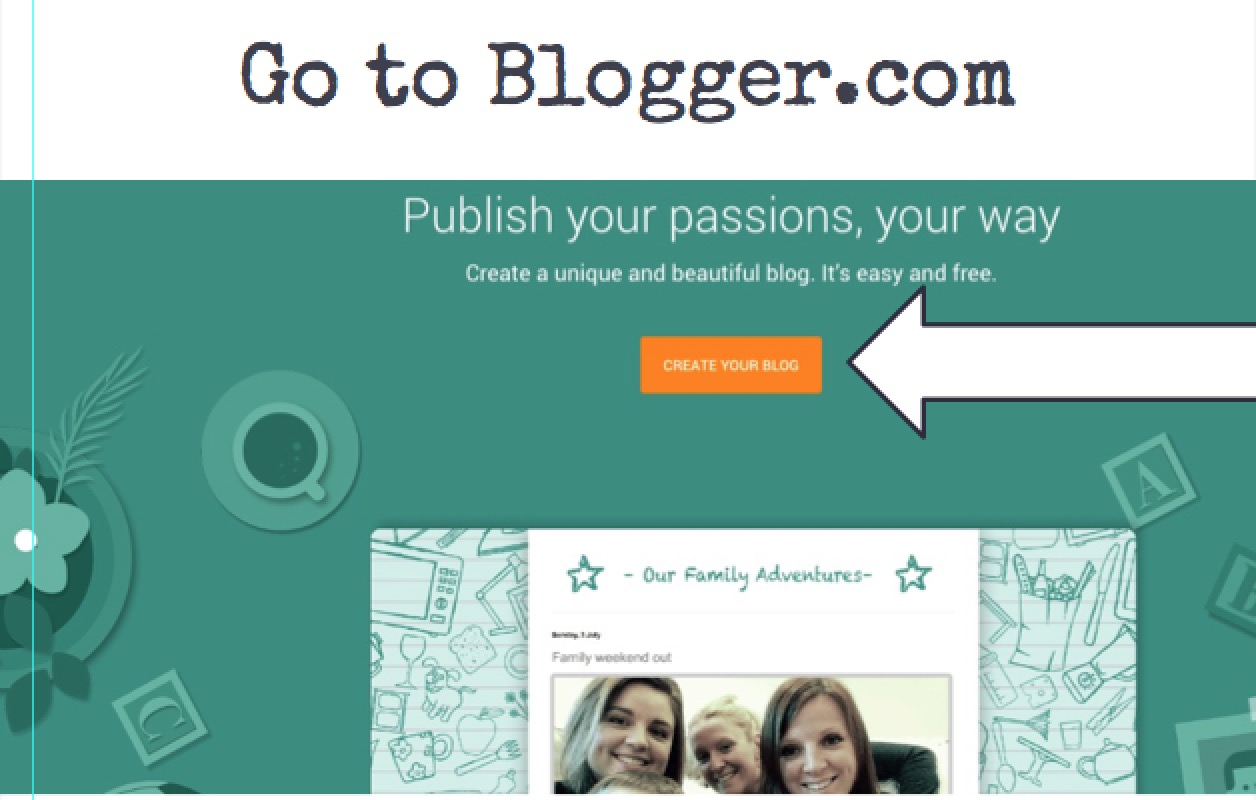
To see a larger version of this image or other images in this post, when available, click the image.
You need a google account to create blog on the blogger platform. Google might recognise you if you are already signed up for a Google product. Then if you are not signed into Google you will see a sign in page that may be similar to the next image.
Or you may see a different sign in like this one.

If you do not have a Google account look for the ‘Add account” link and follow the steps for create an account. (Purple arrow above.)
Tip: If you do not have a google account I recommend you create a G-mail account at the same time that will give you a web based email you can use on the blog. I will try to discuss later in another blog post why you need a separate email address for your blog.
So you have clicked the create a blog button and this is what you see:
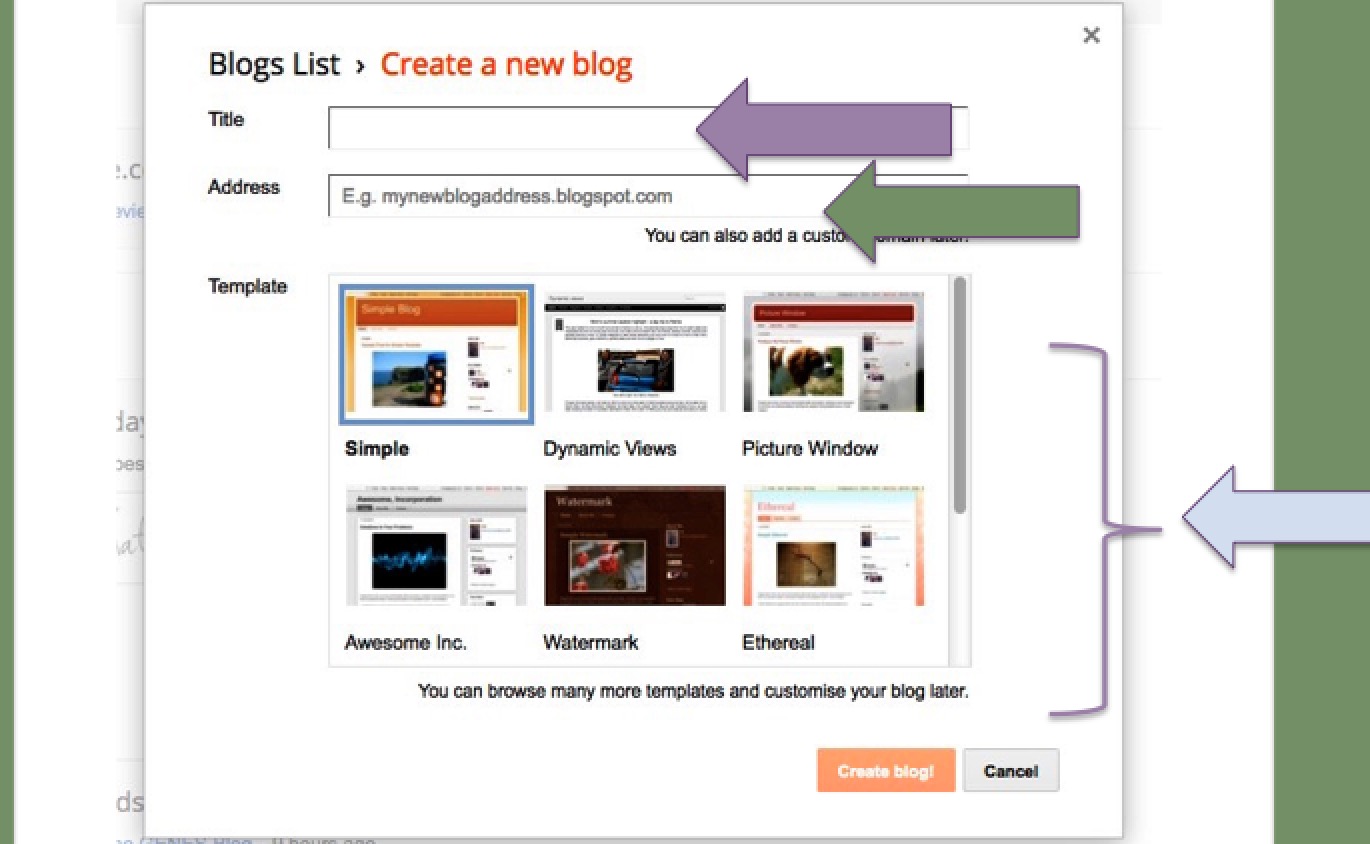
Start creating your blog by adding a blog title.
Add the address – can vary from your title and ends in .blogspot.com. e.g., yourblogname.blogspot.com.
Pick a design. Don’t get too carried away selecting the one you prefer. Just pick one and a move onto the next stage as you can browse many more templates and customise your blog later.
Here is the above image with a title added and the web address ending in .blogspot.com. The second arrow down show the confirmation by Google that the address you selected is available. If not you will need to select an alternative.

Once you have selected an address that is available and clicked the create blog button, you have created your blob and you end up at the overview page for your blog.
You are nearly there and will soon blog family history
Big breath. Release slowly.
If you have managed to get this far do not get overwhelmed at this stage. If looks more complicated than it really is so do not get stressed out by this page. You can mostly avoid its contents at this stage.
Do not panic!
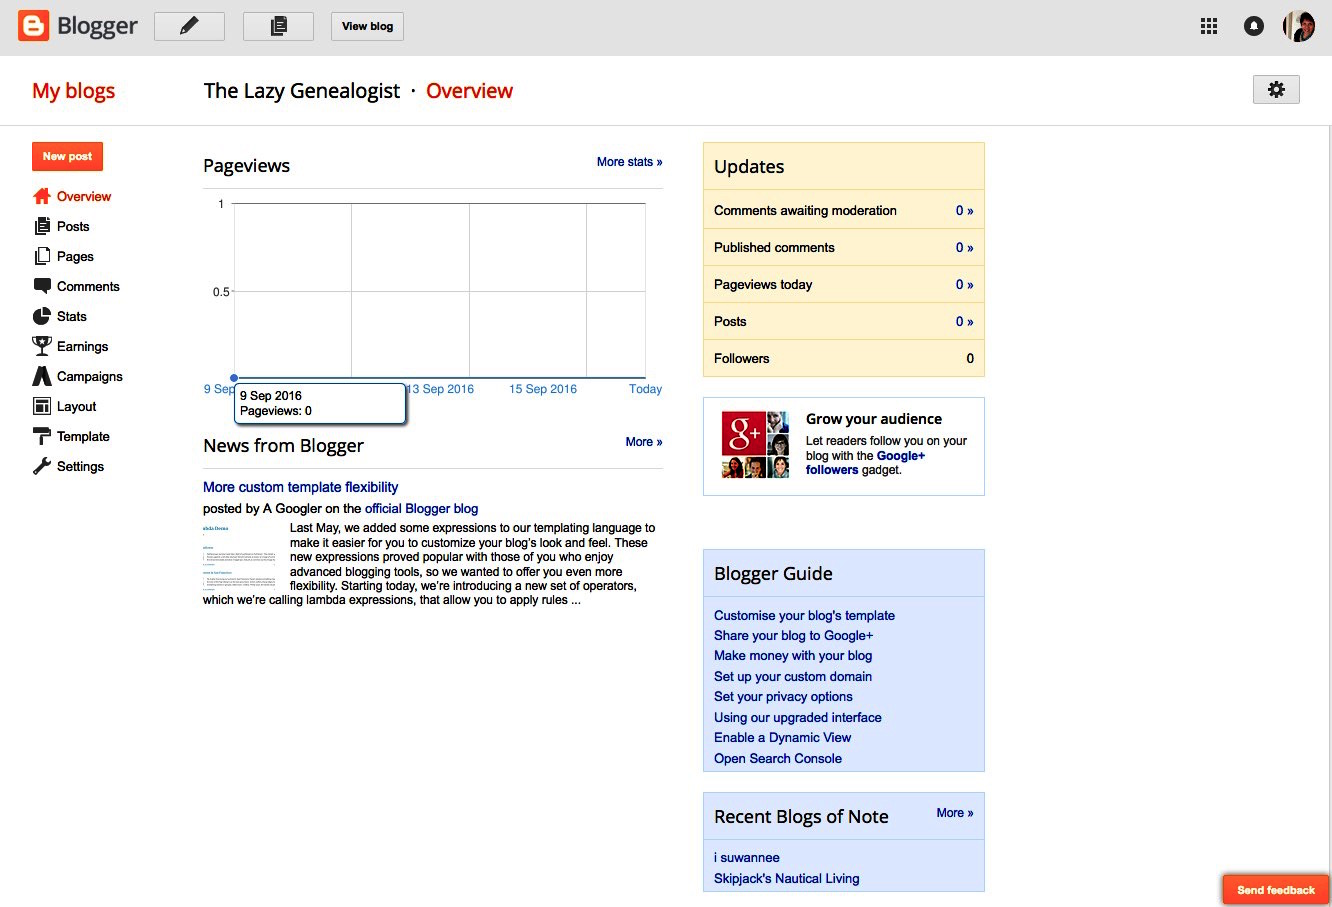
Google has provided loads of ways to help so I repeat you do not need to worry about that stuff now.
Want to see what you blog looks like?
Well you are a blogger now after all. In the image above see the “view blog” button at the top/left side. Click this.
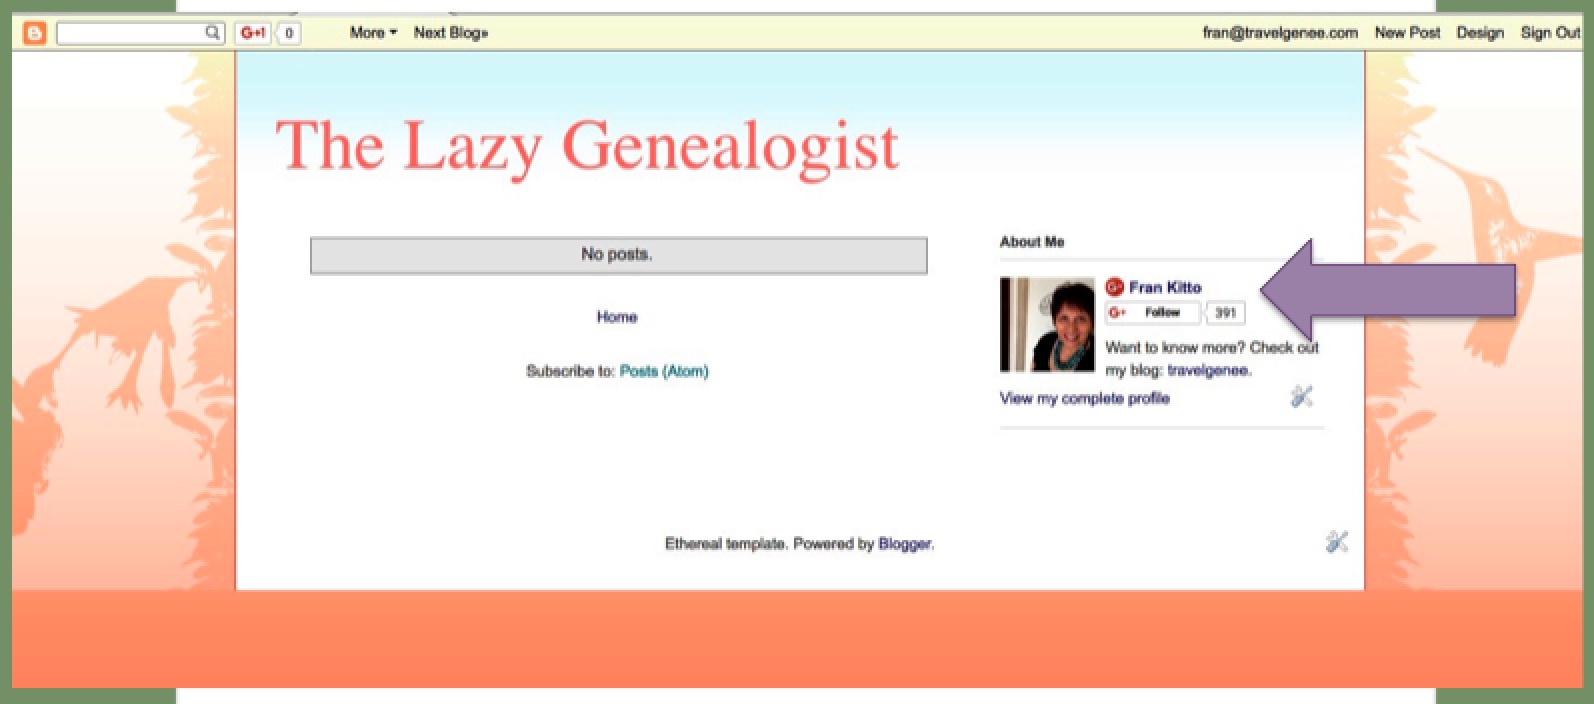
Google does a lot of the work for you. For example, because Google knows me, my profile/About me page is already created from a public profile l use already on google. You can come back later to create yours.
It is probably a good point to say if you get lost just type in your blog address in the browser (not the search area) and you will get back to it. On the top menu bar you will see on the far left if you need to log in again, if logged out.
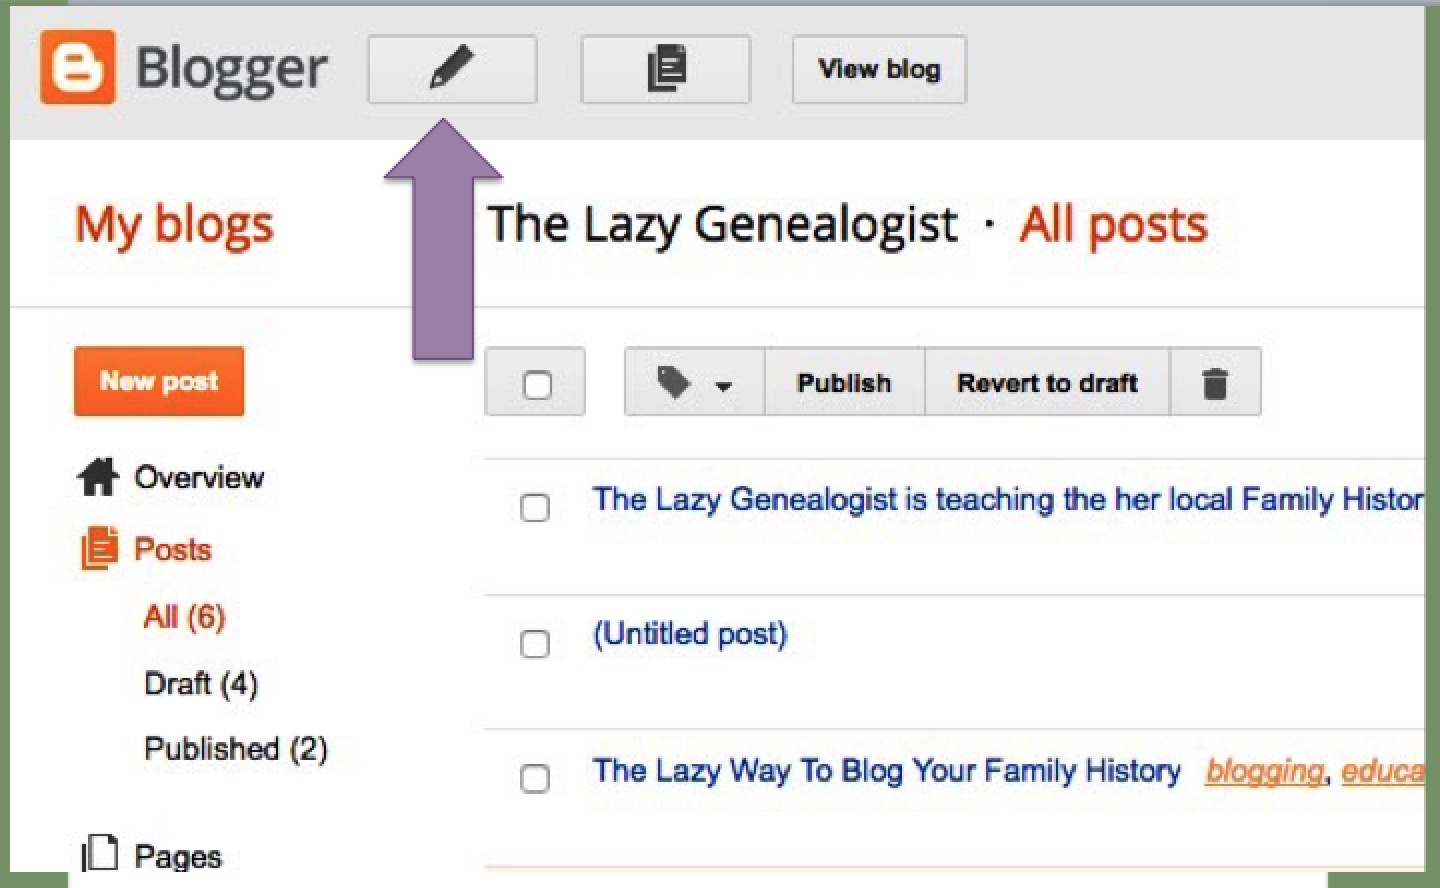
Now write your first blog post
Click new post on the top menu. Or if you are on another Blogger screen look for the pencil icon. Here are 2 screen examples with pencils.
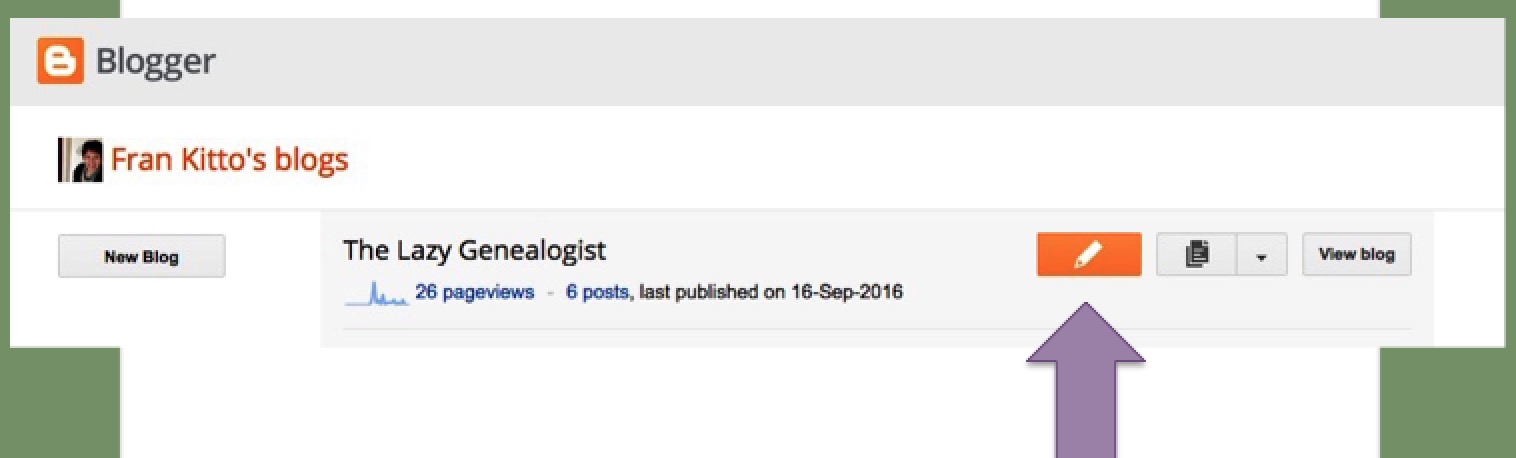
And another example of a pencil icon that is clicked to move to the blog writing screen.
You have clicked the icon and this is what you see:
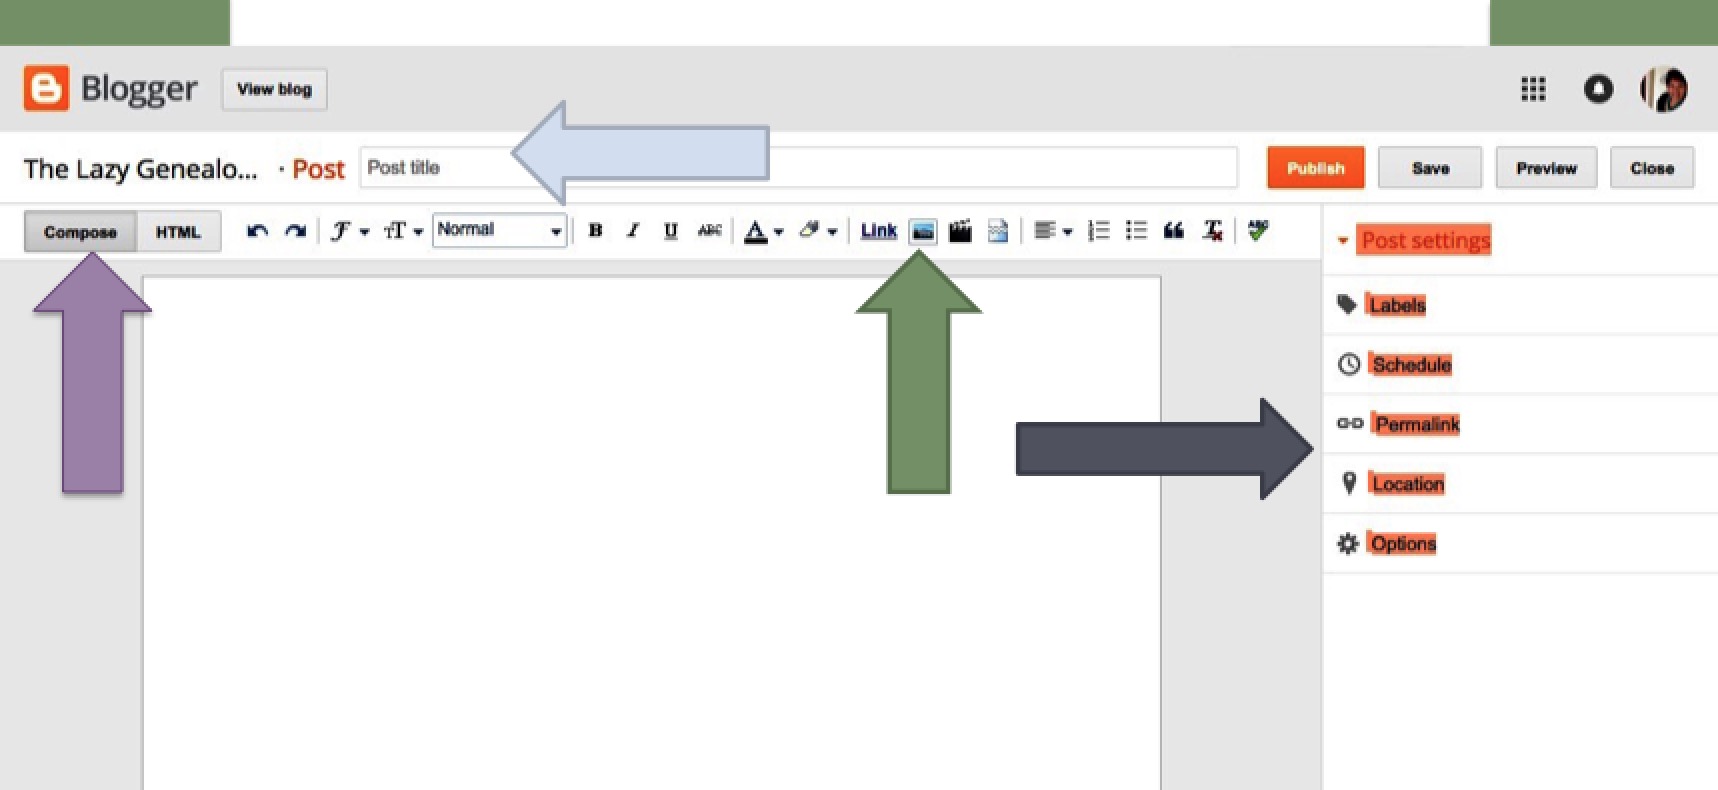
Set the compose/ html button to compose (purple arrow) to avoid complex html code. There is also collection of options on the right hand side highlighted in orange (navy arrow). You can avoid these presently. Focus on the goal – to blog family history.
Add text
Start creating your first post in the space. If you need more help here are a few more tips.
The menu bar will give you a variety of tools to create your post. Similar to MS Word. For example, you can highlight text to make it bold.
Tip: What I will warn you here is not to type up your post in MS-Word and paste it into Blogger. Word has a lot of background code that will be hidden but can make you blog go “wonky”. You might not see this but others might when reading in different browsers.
Tip: A suggestion for your first blog post is to type up what you see is the purpose for your blog.
Add a title (lilac arrow). If a title does not come to you straight away you can add this later once you have written the content. Writing the content might inspire a title.
That is the writing part.
Add an image
Lets add an image now. See the green arrow is pointing to the “Add image” icon. Click this.
When I clicked the image button Google provided a tip that you can drag and drop images directly into your post drafts. Providing hints is one of the reasons Blogger is a great starting platform for blogging. Here is the hint:

It is pale but there is an, “OK, GOT IT” button to click to remove any hints.
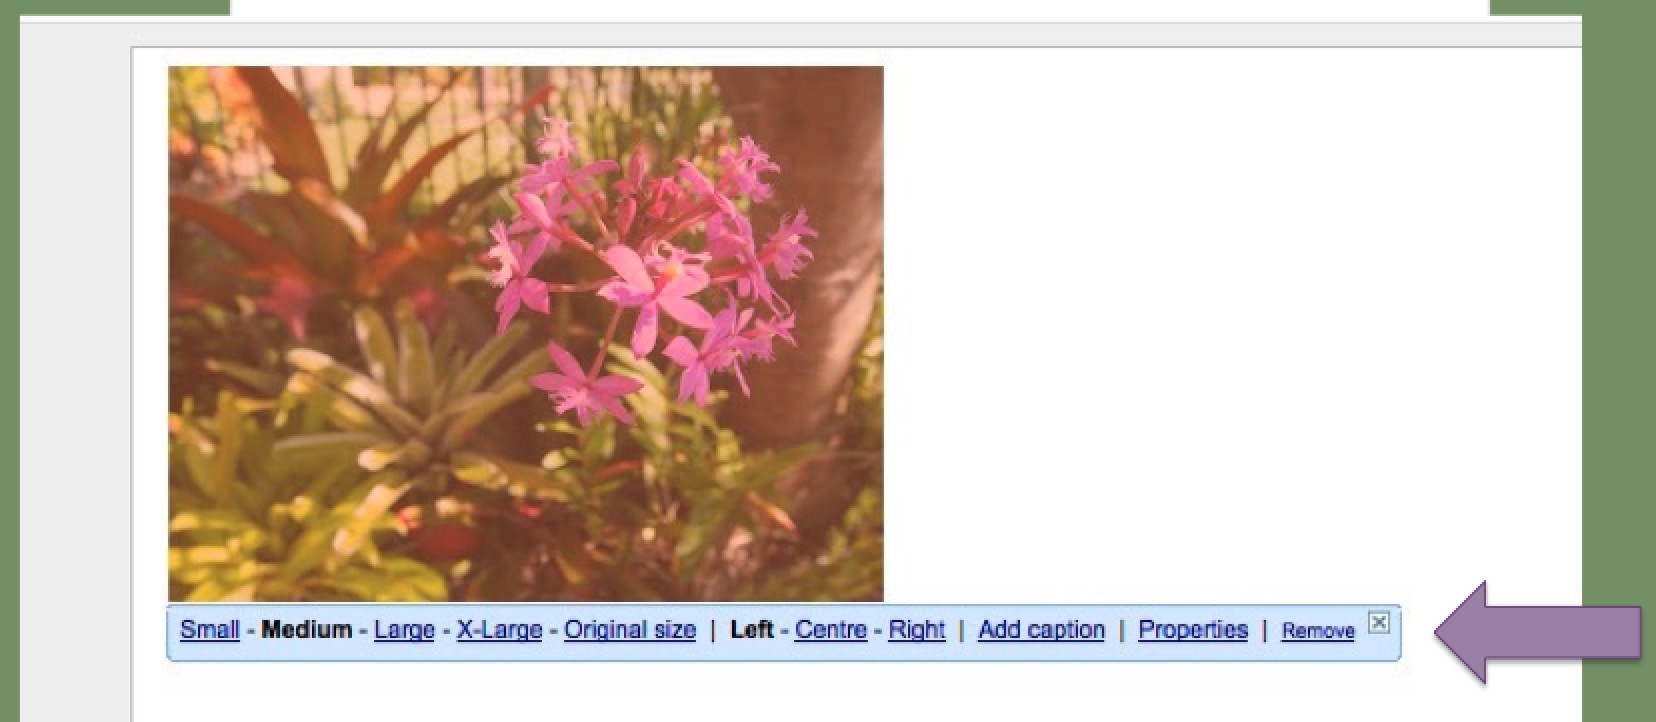
Find the slide in your folders and drag and drop it into the blog post you are writing. IF the image is the wrong size or in the wrong position, click the image to bring up the image options. As you can see from the image below there are many options.
Add a header
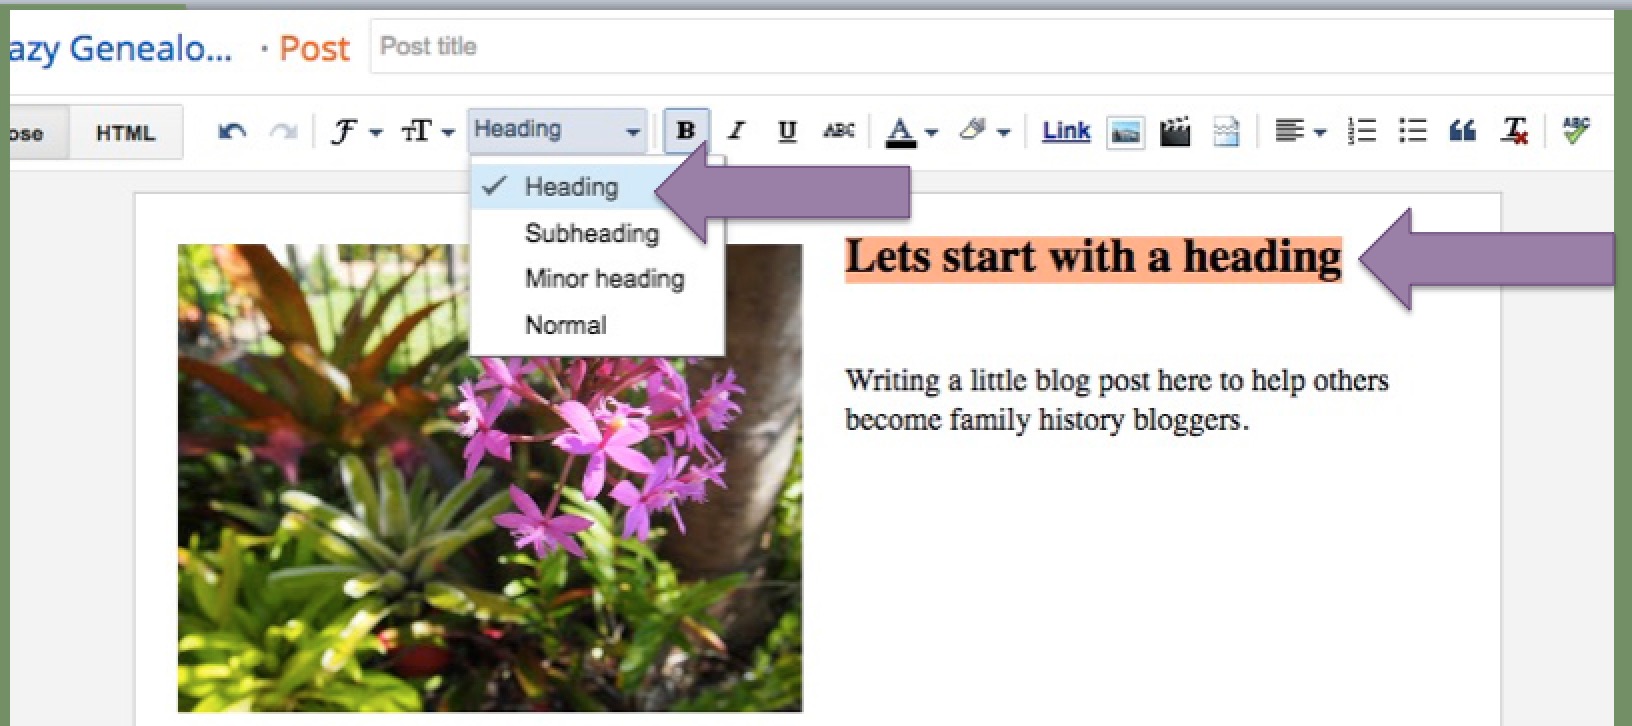
Now you have an image with text so how about some headers to made the blog flow better for the readers.
Highlight the text you want to be the header and select the header size from the menu.
Publish your first blog post
So now you have text, header and images so can publish your first blog post so lets find out how to publish your first blog post.
To publish use the publish button. You will find it with the Publish, Save, Preview or Close 4 buttons on the right hand side.
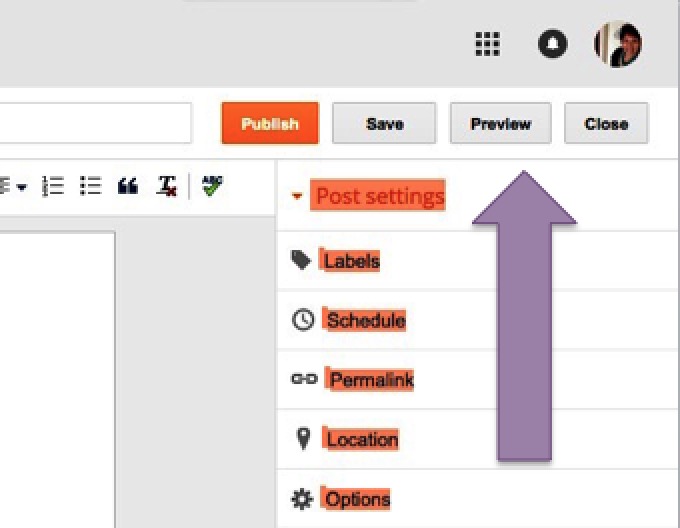
I remind you again that you do not need to worry about the post settings – the ones highlighted in orange in the above image. Remember the goal is to blog family history not become a techo.
What is stopping you?
Next was question time in the presentation. I will create the glossary with technical terms soon between work and sleeping. Book mark this page as I will add a link to it when completed.
Feel free to leave a comment. Especially if you attended my talk or if you have recently started your family history blog leave a link so I can follow you.
Sources:
- http://www.webdesignerdepot.com/2011/03/a-brief-history-of-blogging/
- Google Blogger Support
thanks Fran!